Ok, so now you know how to make awesome soy balls and you're wondering what you can pair it with. Now, the soy balls were a tricky "recipe" that needed specific ingredients so to make up for it and had to be done "right" or it won't work. Just to be fair I'm now going to teach you how to make a dish that you can just throw together. I really intend this blog to be more "here's how we do it, let me know how you do it." than exact recipes that you have to follow to a t. So I had a couple people ask me about how we make fried rice and I totally get that because it was very recently that we figured out a couple small tricks that make it so much better instead of a second-rate version of take-out. It's pretty hard to screw it up and you don't have to use the exact ingredients I use. In fact, we rarely use the same ingredients anyway. It pretty much depends on what veggies are in the fridge/freezer. So, the list of ingredients is really just a potential list of ingredients but don't worry too much if you're missing one of the ingredients. (Unless it's rice. You pretty much need rice in order to make fried rice. Sorry to be the bearer of bad news.)
Ingredients:
Tofu (firm or extra firm is ideal)
Turmeric
Leftover rice
Soy Sauce
Salt
Sugar
Garlic
Onion
Veggies such as:
Celery
Carrot
Mushroom
Bell Pepper
Cauliflower
Broccoli
Frozen Peas
Canned Corn
Green onion
Whatever else you like.
Other options could be tomatoes, water chestnuts, frozen mixed veggies, cashews or whatever else you feel like experimenting with.
Alright...so you may have already noticed that I said leftover rice. I'm embarassed to say how recently I learned that this is the secret to good fried rice so I thought I would tell you guys because you might not know either. This is the one thing that's close to non-negotiable. If you use fresh hot rice your fried rice will be mushy and kind of greasy. If you don't have any rice pre-made the second best option is to make your rice and then fold it and fan it till it cools a bit and put it in the fridge for a couple hours. Ideally though your rice should have sat in the fridge at least overnight. A couple days is even better. I didn't put amounts because it will totally depend on how many people you're cooking for and what you're cooking it in. We make our rice in a little ricemaker so we just use the amount our rice make makes which is about 4'ish cups I think. Your best rice for this is a white long grain but brown works too and is better for you.
Step one: prep your onions, garlic and other veggies. This whole process will be a lot easier if you did this ahead of time instead of trying to chop and add things at the right time while continuing to stir. The vegetables can be chinese cut which means fairly thick and on an angle. They can also be smaller if you're feeling like you want to spend most of your life chopping things. Try to keep things separate in their own bowls because they all have different cooking times. If you're adding a lot of veggies a little of each will do. I've mostly tried to add these to the list in the order that I would add them to the wok.
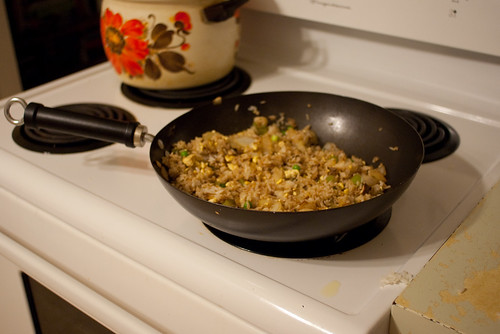
Next: heat your pan! I bet I know what you usually do. You put your pan (preferably a wok with lots of room) on the stove and throw some oil in it right away. Am I right? Not anymore. Here's the new protocol: wok goes on the stove just above medium heat and no oil goes in until it's hot. Otherwise the oil cools the pan down and your food ends up soaking in oil instead of frying. This gets you that gross greasy food you do not want. If you don't heat your pan up enough your food will also stick and your texture won't be right. If you do heat the wok up then enough adding oil will create a thin film that goes into the pores of the metal, creating a non-stick effect. This way you use less oil to stir-fry and we all win! So now you're like "But Kristy, how do I know if it's hot enough? If I put my hand in the wok I will burn it." Don't be silly! Until you get those new silicone robot hands you asked for for your birthday here's how you do it-- stick your hand under the cold water tap, then walk over to the wok (tee hee.) and sprinkle a couple drops in. Your wok is hot enough when the water sizzles and evaporates pretty quickly. If it just sits there we're not there yet temperature wise. If it evaporates immediately you're ok to start but I would drop your temperature a little bit since we're not working with meat here and don't need it quite that hot.
Alright, yes...you've read a lot and so far you only have a hot wok to show for it but bear with me here. Once you know the outline of how to make this it'll be really easy and another delicious dish to add to your cooking repertoire. Now that your wok is up to the right temperature add enough oil to coat the wok and move the pan around a bit to get a nice coating of the oil. Once it's hot you can cook up your tofu. I use about a quarter of a regular size block and you just crumble it into the walk. Throw a couple shakes of turmeric on it (mostly for colour) and a bit of salt and fry it up till it looks like scrambled eggs. Once this is done remove your tofu from the wok and set it aside.
Ok, a bit more oil in the wok and give it a few seconds to heat up. Then take your wok off the burner while you add onion and garlic. (this is just to prevent it from burning) Then you can throw it back on the burner and get things moving. Now, just keep adding in your veggies and stir frying. If you're using any frozen veggies or canned veggies don't add them quite yet. Likewise, the green onion will go in pretty much last. Alright, once your fresh veggies are nicely sauteed move them to the outside of your wok making a well in the middle to dump in your rice. As you add it it's best if you can kind of crumble it a bit to separate the grains. Now you can add a couple tablespoons of soy sauce and a couple pinches of sugar and some random amount of salt. Now's a good time to give it a taste it and decide whether you want more of any seasonings. Finally, stir in some frozen peas till they're warmed, then I like to add your tofu back in and the green onion last and just stir that through and then eat it and say "Mmm...that's delicious!"
I know that sounds like a lot but this is really a dish that can be made including prep in probably 15 minutes or so once you know what you're doing. The key is to get all your prep out of the way before starting and it will make the actual cooking of the dish quick and easy. Now you know!
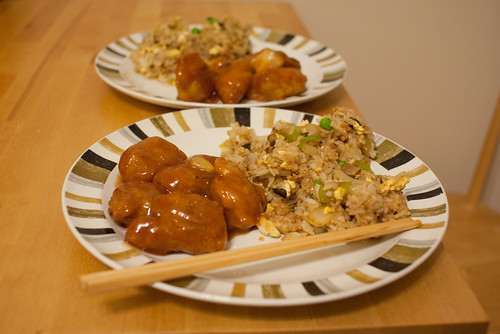
And here is a fancy photo I took of one of the last batches we made. Next time we make it I will try to take a better photo and maybe some of the prep along the way to add in.


